

Author Note: This guide is based on our first-hand experience designing, trenching, and zoning a budget-friendly PVC irrigation system for our commercial tropical flower field. All methods reflect real-world testing in a frost-free climate.
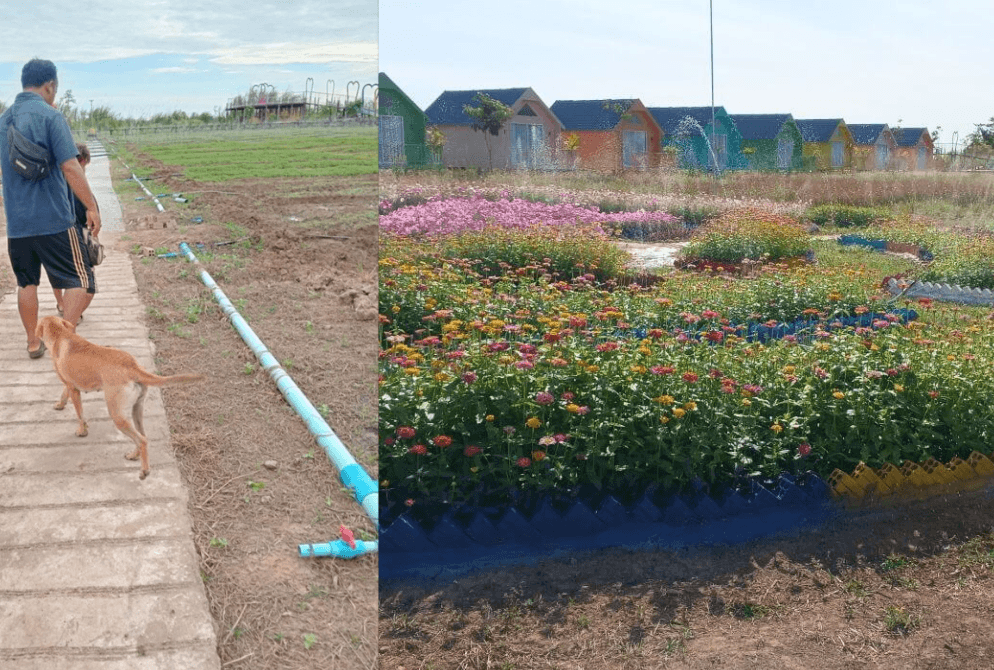
Step into our flower field and you will see colorful blooms everywhere, their sweet fragrance carried across the rows, held up by strong, healthy stems and leaves. Everything sits inside creatively styled vertical brick borders, and water sprinkles steadily over the entire space.
Most people assume that kind of edge-to-edge coverage requires an expensive, commercial-grade underground irrigation setup. It does not.
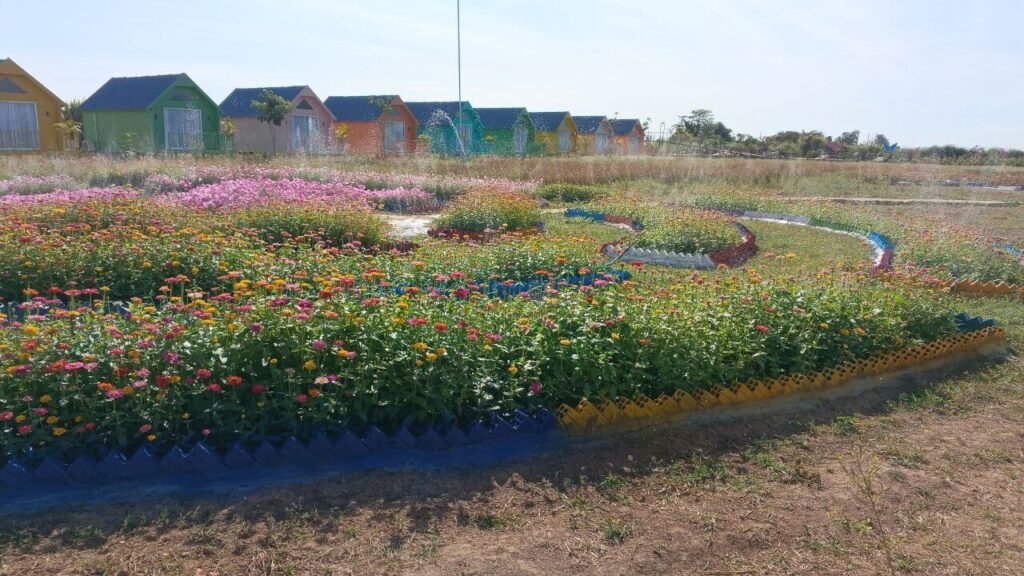
When we first built our budget-friendly irrigation system for large flower fields, we did not have the capital for commercial landscaping equipment. So we engineered an affordable, highly durable alternative using standard PVC pipe.
If you are expanding a home garden into a commercial flower business or managing a large-scale landscape, you quickly learn a harsh lesson: manual watering does not scale.
Our farm holds thousands of flowers that depend on consistent soil moisture. Watering with a standard hose would cost us countless hours of manual labor every single day, and in a hot, humid tropical climate, inconsistent watering can stress or destroy a flower crop in a matter of days.
This guide walks through exactly how we designed, trenched, and zoned an irrigation system for a large flower field using standard blue PVC pipes, simple mechanical valves, and basic hand tools.
Key Takeaways
- Significant Cost Savings: A DIY rigid PVC irrigation system costs 60% to 70% less than commercial underground drip lines and automated controller boxes.
- Climate-Specific Trenching: In frost-free tropical climates, shallow trenching (just deep enough to protect pipes from surface foot traffic and mowers) works perfectly.
- Manual Zoning Solves Pressure Drops: Using simple red-handled ball valves allows you to divide a large field into manageable zones so a standard water pump delivers strong, even pressure to every sprinkler head.
- Pre-Burial Leak Testing: Testing every glued PVC joint under full pressure before backfilling trenches saves hours of messy excavation work later.
Why a DIY Irrigation System Starts With the Right Materials
Commercial landscaping contractors typically build irrigation networks using expensive polyethylene (PE) drip lines, electrical solenoid valves, automated multi-station timers, and commercial manifolds.
When you are launching a self-funded garden business, spending thousands of dollars on automated infrastructure simply isn’t necessary.
DIY PVC vs. Commercial Irrigation Cost Comparison
To understand why we chose rigid PVC over a commercial installation, look at the financial breakdown for a standard half-acre flower field:
| Component / Requirement | Commercial Contractor Estimate | Our DIY Blue PVC System | Why We Chose DIY |
| Main & Lateral Lines | Commercial PE Tubing & Drip Lines ($450+) | Standard Blue PVC – 1″ & 3/4″ ($140) | Higher durability against heavy foot traffic, UV rays, and tools |
| Zoning & Valves | Electric Solenoids & Automated Timer ($350+) | Manual Red-Handle Ball Valves ($45) | Simple mechanical reliability; zero electrical failure risk in wet areas |
| Fittings & Risers | Commercial Brass/Pro Manifolds ($200+) | Standard PVC T-Fittings & Elbows ($35) | Readily available at any local hardware store for instant repairs |
| Labor & Trenching | Professional Heavy Excavation ($500+) | Shallow DIY Trenching ($0 – Sweat Equity) | Frost-free climate eliminates the need for deep 18-inch frost-line trenches |
| TOTAL ESTIMATED COST | ~$1,500+ | ~$220 – $250 | Saved over 80% while achieving full edge-to-edge spray coverage |
What to Buy: The PVC Supply List
For our farm, we chose standard blue PVC pipes (commonly used for agricultural and high-pressure water lines). They are highly affordable, easy to cut with a simple hand hacksaw, straightforward to solvent-weld, and hold up exceptionally well to constant water pressure and tropical heat.
Here is the exact hardware bill of materials required for a field-scale setup:
- Main Water Line: 1-inch to 1.5-inch thick-walled blue PVC pipe (carries volume from the water source to the field perimeter).
- Lateral Sub-Lines: 1/2-inch to 3/4-inch blue PVC pipe (branches off the main line into individual flower beds).
- Solvent Welding Supplies: Quality PVC primer and heavy-duty PVC cement/glue.
- Fittings: PVC T-fittings, 90-degree elbows, end caps, and threaded male/female adapters for sprinkler risers.
- Zone Control: 1-inch and 3/4-inch manual ball valves (look for the durable models with red handles).
- Sprinkler Heads: Overhead rotating or micro-spray heads suited to your specific flower height and soil absorption rate.
How to Trench PVC Irrigation Pipe in a Large Flower Field
The most labor-intensive part of building an underground irrigation system is the excavation. However, because our flower field sits in a frost-free tropical climate, we never needed to bury our pipes deep below a subterranean frost line.
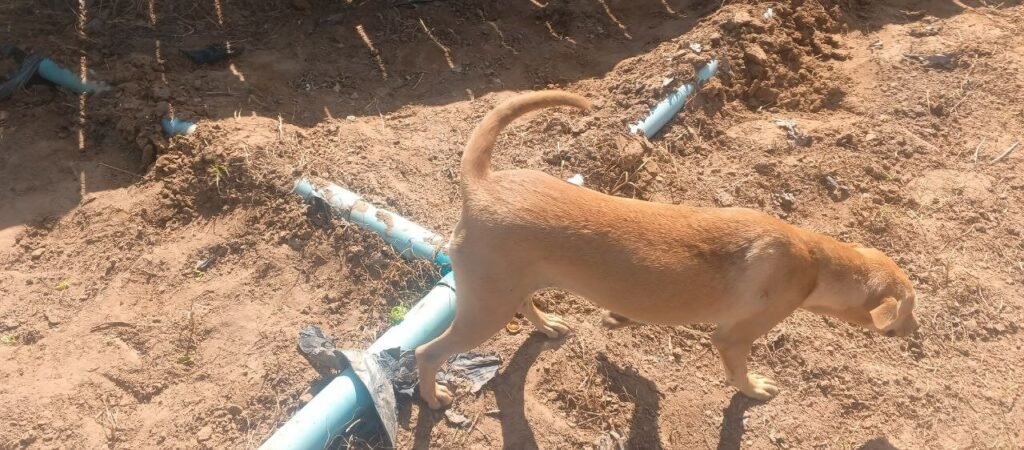
Rather than digging 18-inch trenches, we excavated shallow channels—just deep enough (around 4 to 6 inches) to tuck the PVC pipes out of sight and protect them from crushing foot traffic, wheelbarrows, and maintenance tools.
The Step-by-Step Trenching & Assembly Process
- Mark Your Lines Clearly: Use masonry string or landscape spray paint to map out where the main supply line and lateral branches will run before digging.
- Excavate Shallow Channels: Dig straight, flat-bottomed trenches along your markings. Remove any sharp rocks or roots that could crack the PVC under pressure.
- Dry-Fit Every Joint First: Lay out all PVC pipes, T-fittings, and elbows inside the trench without glue. This critical check confirms your measurements, spacing, and sprinkler riser locations before anything is permanently welded.
- Prime, Glue, and Cure: Working section by section, apply PVC primer followed by solvent cement to both the pipe exterior and fitting socket. Push with a quarter-turn and hold for 30 seconds. Allow the entire network to cure according to the manufacturer’s instructions before introducing water.
Matching Your Water Pump to Sprinkler Heads (Technical Design)
One of the most common mistakes in DIY agricultural irrigation is underestimating water hydraulics. If you connect 20 or 30 sprinkler heads directly to a single water line, the water pressure (PSI) and volumetric flow rate (Gallons or Liters per Minute) will drop precipitously. Instead of a wide, even spray, the heads at the end of your field will barely output a weak trickle.
On our farm, we operate a standard 1.5 HP agricultural water pump. While this pump delivers excellent volume, it cannot push optimal operating pressure (typically 30 to 45 PSI per head) across our entire field simultaneously.
To solve this without upgrading to an expensive commercial turbine pump, we engineered a zoned distribution system. By calculating the maximum flow rate of our pump against the demand of our rotating sprinkler heads, we determined that our system operates at peak efficiency when driving exactly 4 to 6 sprinkler heads at a time.
Irrigation Zoning with Shut-Off Valves for Large-Scale Watering
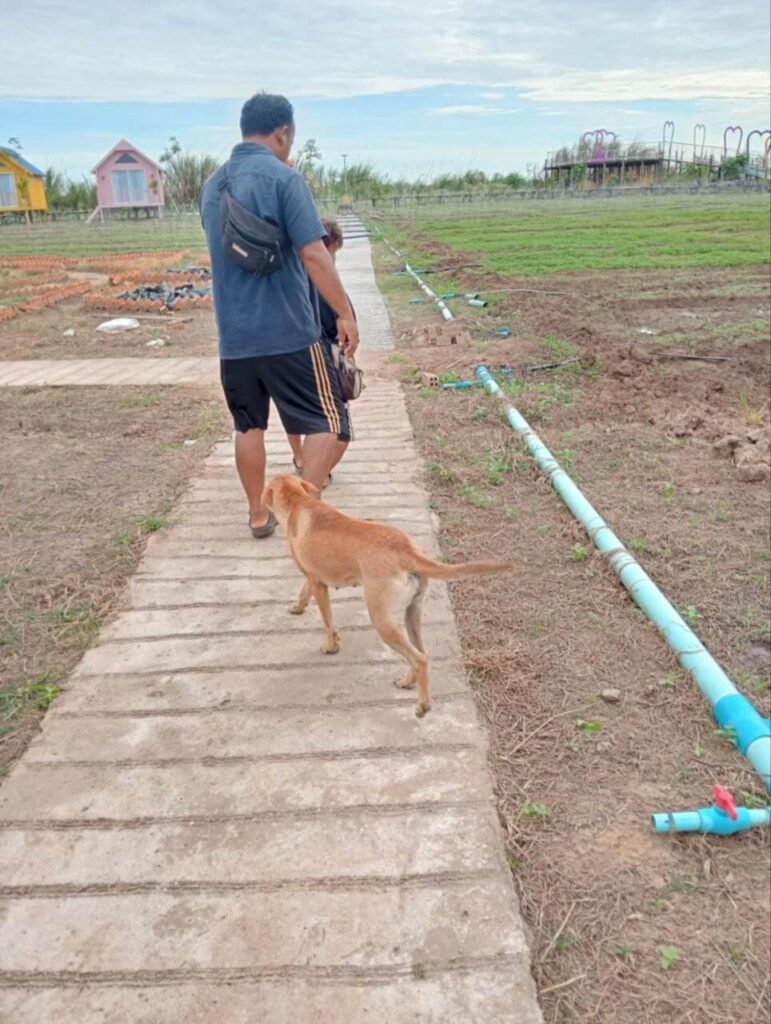
To divide the field into functional hydraulic zones, we installed manual red-handled PVC ball valves at the junction where each 3/4-inch lateral line meets the 1-inch main supply line.
Why We Placed Valves Along the Walkway
When laying out our pipe schematic, we deliberately ran the thick 1-inch main water line parallel to our paved garden footpaths. This design choice gave us two major daily advantages:
- Zero Garden Bed Compaction: We can walk along the clean footpath and open or close the red zone valves by hand without ever stepping into the mud or compacting the soil around delicate flower roots.
- Precise Pressure Management: By opening Zone 1 and keeping Zones 2, 3, and 4 closed, 100% of the pump’s water pressure is directed to a specific section of the field. Once that area receives an inch of water, we manually open Zone 2 and close Zone 1.
How to Test an Irrigation System for Leaks Before You Bury It
Never backfill a trench until your irrigation system has passed a live pressure test. Once your solvent cement has fully cured, screw capping plugs or temporary sprinkler heads onto your risers, open your zone valves, and turn on the water pump.
Walk the entire length of the exposed pipeline and inspect every single glued joint, T-fitting, and valve threaded connection for drips or micro-spray leaks.
It takes less than five minutes to cut out and replace a weeping PVC joint while the pipe is sitting exposed in a shallow trench; repairing that same leak after it has been buried under a blooming perennial bed requires destructive digging.
Adjusting Sprinkler Radius for Vertical Brick Borders
Once the system is confirmed 100% leak-free, check the spray coverage and throw radius of each sprinkler head.
Our flower beds are outlined with creatively styled vertical brick borders. We adjust the diffuser screws on our sprinkler heads so that the outer arc of the water spray kisses the inner edge of the brick border.
Proper head calibration ensures that water is delivered exclusively to the plant root zones—preventing muddy, slippery walkways and eliminating wasted water.
(Note: Adjusting sprinkler trajectory and nozzle sizes for specific cut-flower varieties like zinnias versus cosmos will be covered in our upcoming technical guide on nursery water management).
Final Thoughts & ROI on a DIY Flower Field Irrigation System
Building a budget-friendly irrigation system for a large flower field demands upfront sweat equity, careful hydraulic planning, and precise trenching. However, it is easily one of the highest-return investments you can make when growing a garden into a commercial business.
By replacing hours of manual hose watering with a streamlined, zoned PVC network, you free up critical daily labor for planting, harvesting, and marketing—all while ensuring your flower crops receive the consistent, even hydration they need to produce strong stems and vibrant blooms.
Start with a simple main line along your walkway, map your zones around your pump’s true pressure limits, and expand the grid as your flower business grows.
About the Author & Project Builder
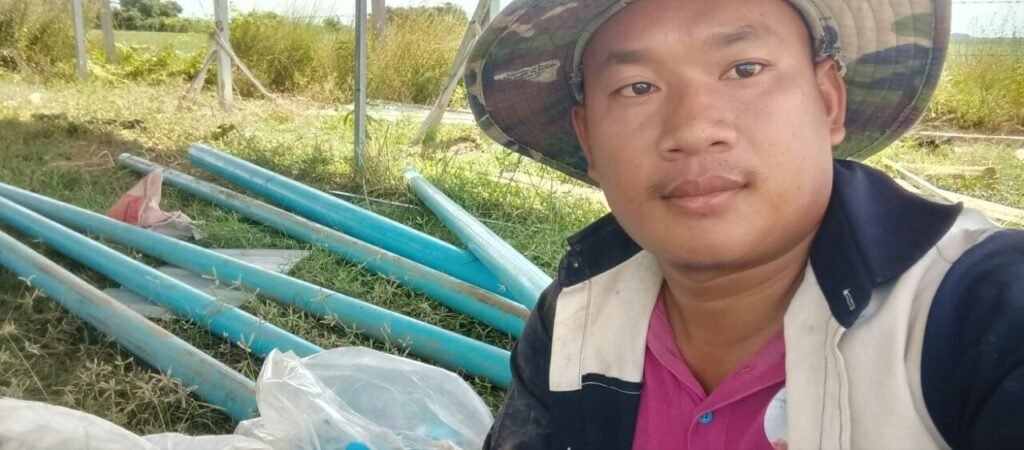
This DIY irrigation framework was designed and installed on-site by the founder of our commercial cut-flower farm. With years of hands-on experience in tropical horticulture and farm infrastructure design, our blog is dedicated to helping independent garden businesses build cost-effective, scalable landscaping systems that work in the real world.
Frequently Asked Questions
Do I need expensive equipment to irrigate a large flower field?
No. Commercial companies often use underground drip lines and automated timers, but standard PVC pipes are an affordable alternative that still holds up well under high water pressure, which is enough for a new garden business.
How deep should irrigation pipes be buried in a frost-free climate?
In a frost-free climate, pipes do not need to go below a frost line. Trenches only need to be deep enough to protect the PVC pipe from foot traffic and equipment like mowers or tractors.
Why do large flower fields need irrigation zones?
Because a single water pump usually cannot run every sprinkler head at once across a large field. Manual shut-off valves let you run one zone at a time, so each section still gets a strong, even spray.
When should I test an irrigation system for leaks?
Before burying the pipes. Turn on the pump and valves, walk the full pipe network, and check every glued joint while it is still exposed in the trench, since repairs are much easier at that stage.
Is a budget-friendly irrigation system for large flower fields worth the labor?
In our experience, yes. It is one of the highest-ROI projects for a garden business, saving countless hours of manual watering while keeping the flowers properly hydrated.
