

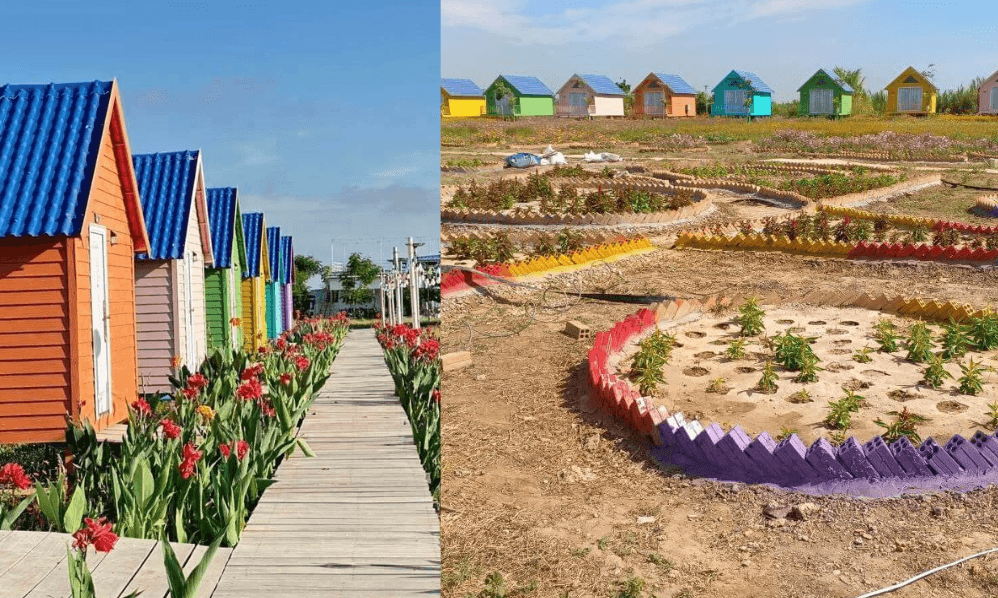
When we first started Dream Garden in 2023, we ran into a landscape problem almost every new landowner faces. We had a large plot of land, and it looked incredibly boring—just a flat expanse of grass and muddy soil with no mystery to it at all. You could see the entire property from the main road in a single glance.
Learning how to divide a garden into sections is what turned that empty, muddy field into the vibrant, multi-zoned garden destination it is today—and we never hired an expensive landscape architect to do it. Instead, we used a practical method called garden zoning.
Key Takeaways
- Garden zoning breaks a flat, overwhelming plot into distinct “outdoor rooms” using walkways, borders, and vertical height rather than permanent walls.
- Build walkways first: Curved paths create visual mystery and make even a small garden feel twice as large by hiding what is around the corner.
- Stop root competition: Cheap brick, bamboo, or painted block borders prevent creeping grass rhizomes from invading flower beds and stealing soil nitrogen.
- Use functional height: A-frame garden cabins, trellises, and tall grasses block direct sightlines to create natural privacy without expensive fencing.
- Build corner by corner: Start with one small, functional zone (for photos, sitting, or planting) rather than trying to landscape your entire property at once.
Why Your Garden Needs “Outdoor Rooms”
Imagine your garden as a house. A well-designed house has a kitchen for cooking, a bedroom for sleeping, and a living room for relaxing. Your garden needs the same spatial structure.
If you plant flowers randomly across an open field without order, the space quickly looks cluttered and messy. Creating distinct sections—often called outdoor rooms—gives the eye natural places to rest.
Horticulturally, it also allows you to manage different microclimates, grouping plants by their sunlight, soil pH, and watering needs.
This practical zoning approach is how we planned every square meter of Dream Garden. Here are the four foundational steps we used to build each section.
Step 1: Draw the Lines With DIY Garden Walkways
The most common mistake new gardeners make is planting flower beds before establishing their pathways. Never plant first. Build your walkways, leisure bridges, and access paths before putting a single root in the ground.
The walkway is the skeleton of your garden landscape. It defines where one section ends and the next begins, prevents soil compaction from foot traffic around delicate roots, and guides the visitor’s experience.
At Dream Garden, we built an elevated wooden boardwalk called the Paradise Bridge to guide guests cleanly through our seasonal flower fields.
Why Curved Garden Paths Work Better Than Straight Lines
We intentionally avoided straight, rigid paths. Instead, we designed sweeping, curved pathways. In landscape psychology, curved paths create mystery and depth.
A gentle curve hides the next section of the garden from immediate view, encouraging visitors to walk forward to see what lies around the bend.
You do not need expensive stone paving tiles to achieve this. We built our paths using affordable timber planks and concrete edging blocks we cast ourselves, paired with painted bamboo railings for safety and color.
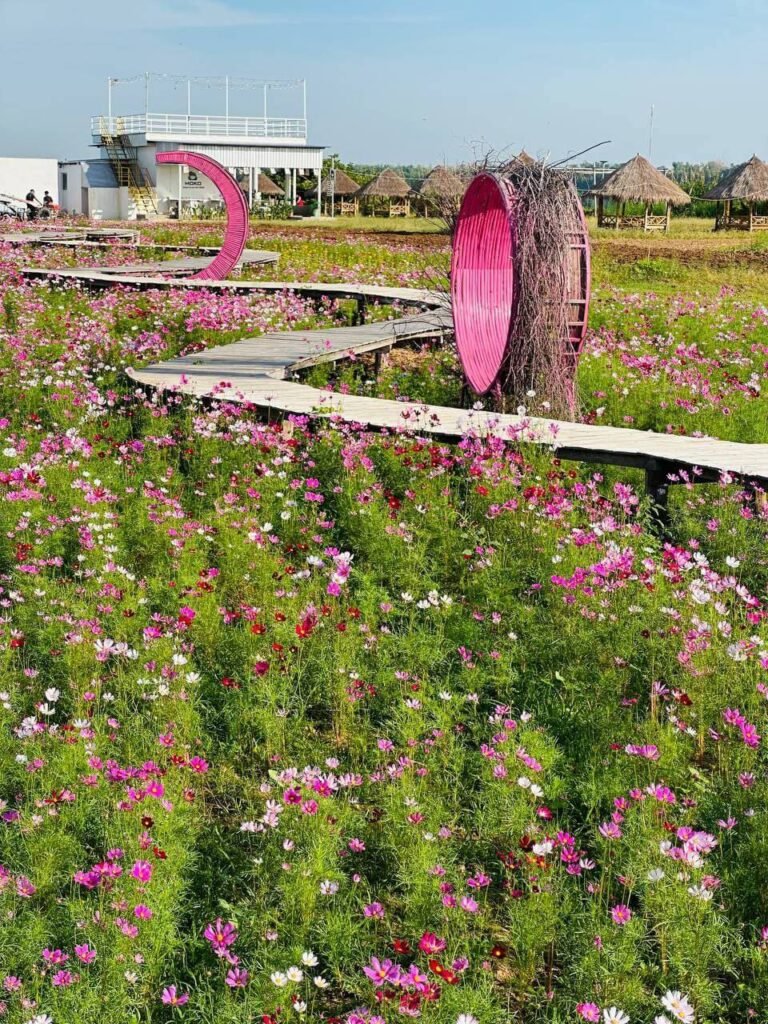
This main pathway immediately did double duty: it automatically divided our open acreage into two major functional zones—the Flower Field on one side and the Rest House Zone on the other.
Step 2: Build Cheap Garden Borders Using Old Bricks
Once your pathways are laid, you must create a hard barrier between your flower beds and the surrounding grass.
If you skip physical garden edging, aggressive pasture grasses will creep into your flower beds within two weeks—especially during the warm rainy season.
Why Unbordered Grass Destroys Flower Beds (The Horticultural Reality)
Grass spreads through underground runners called rhizomes and above-ground stems called stolons. When these grasses invade a flower bed, they form a dense root mat that competes directly with your ornamental plants for essential soil nutrients (especially nitrogen) and soil moisture.
We did not have the budget for decorative commercial stone edging, so we used what we had on hand: recycled old bricks and masonry cement.
This is how our Star Garden project was born. We laid old bricks on the ground and mortared them into a sharp star pattern, painting them in bright, inviting colors.
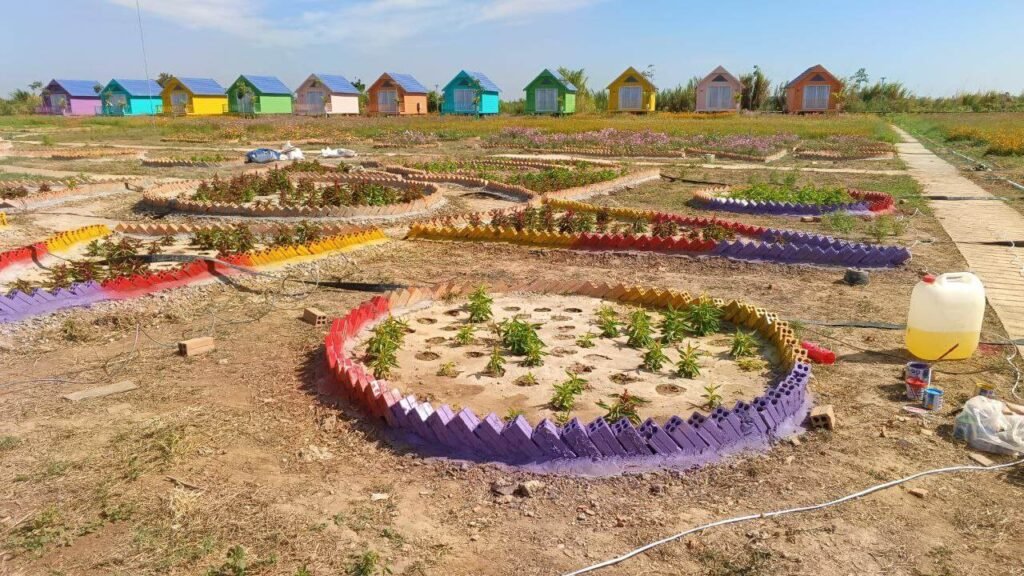
The interior of the star became an enriched, weed-free planting zone with compost-amended soil, while the outside remained a compacted walking zone.
Low-Cost Border Edging Options for Budget Gardens
If you are edging a garden on a tight budget, try these practical alternatives:
- Recycled Bricks: Dig a 3-inch trench and set the bricks vertically or at a 45-degree angle (a “soldier course”) to block shallow grass runners.
- Local Bamboo: Cut mature bamboo stalks into short 8-inch sections, treat them with natural linseed oil to prevent rot, and drive them side-by-side into the soil.
- River Stones: If your property is near a creek, collect large, smooth river stones and bury their bottom third into the earth to prevent shifting during heavy rain.
Step 3: How to Add Privacy to a Garden Without a Fence
A completely flat, open garden lacks character. To make distinct sections feel like genuine “rooms,” you need to block specific sightlines on purpose.
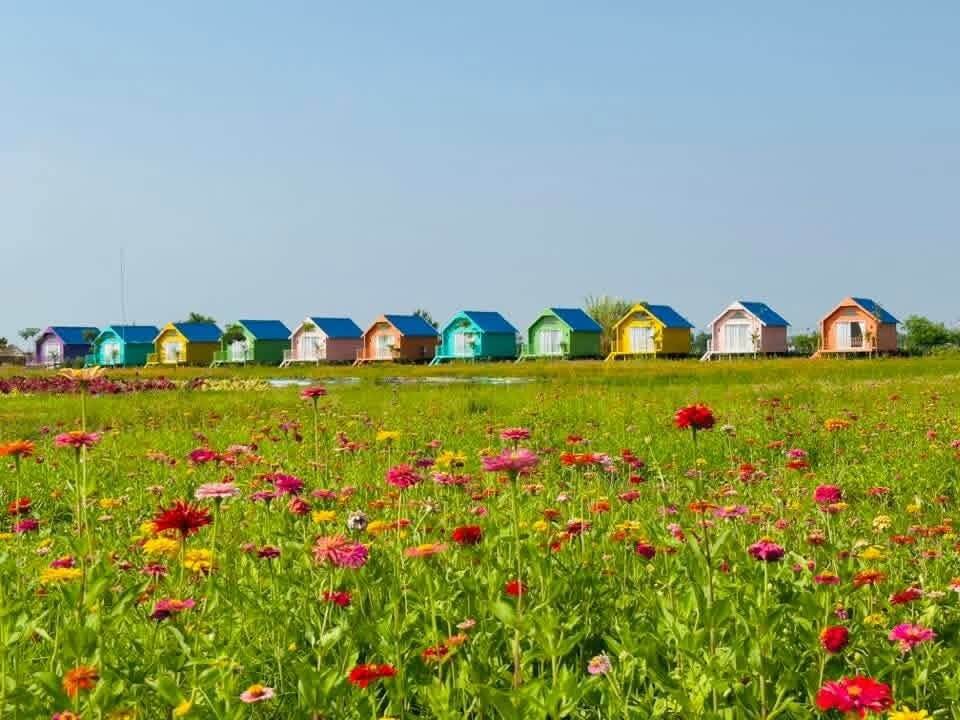
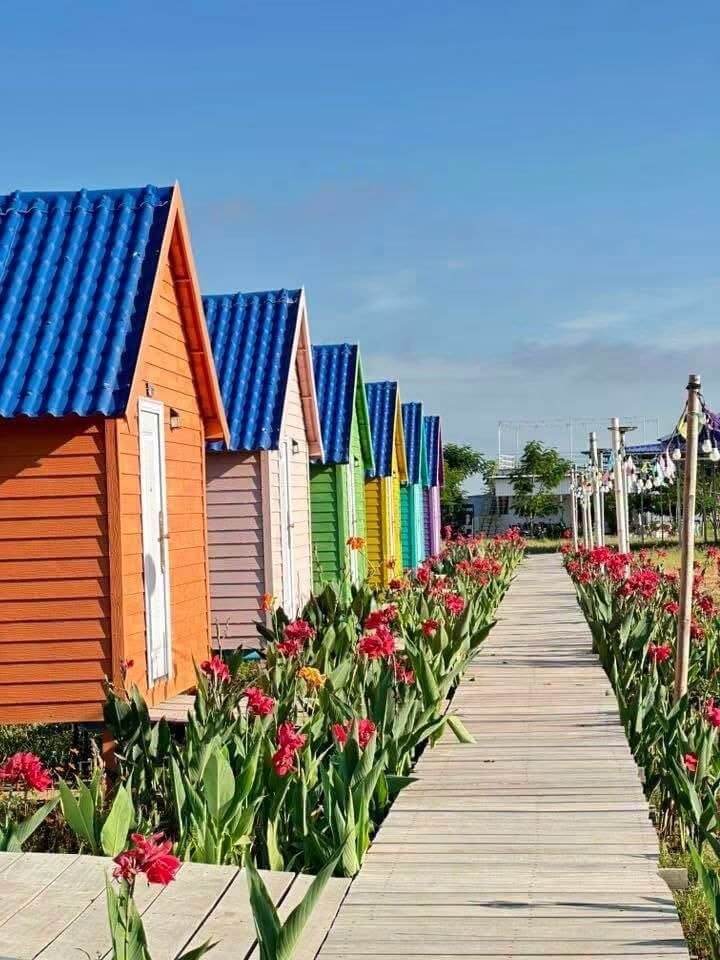
At Dream Garden, we used our colorful A-frame rest houses as functional privacy screens. When you stand at the main entrance, you cannot see the waterfront in the distance because the cabin structures stand directly in your line of sight.
Visitors must walk through the Rest House Zone to discover the River View Zone. That simple structural barrier makes the entire property feel significantly larger than it is.
Natural Living Walls and Vertical Landscaping Ideas
You do not need to build permanent cabins to add height and separation. We also used living plant layers to create natural room dividers:
- Tall Screening Grasses: We planted dense clumps of local ornamental grasses and Lemongrass (Cymbopogon citratus) along border edges. They grow rapidly, provide insect-repelling scent, and form a soft 4- to 6-foot visual wall.
- Climbing Trellises: We built rustic bamboo trellises and trained vigorous climbers like Bougainvillea and Passionflower (Passiflora incarnata) over them to create shaded vertical dividers.
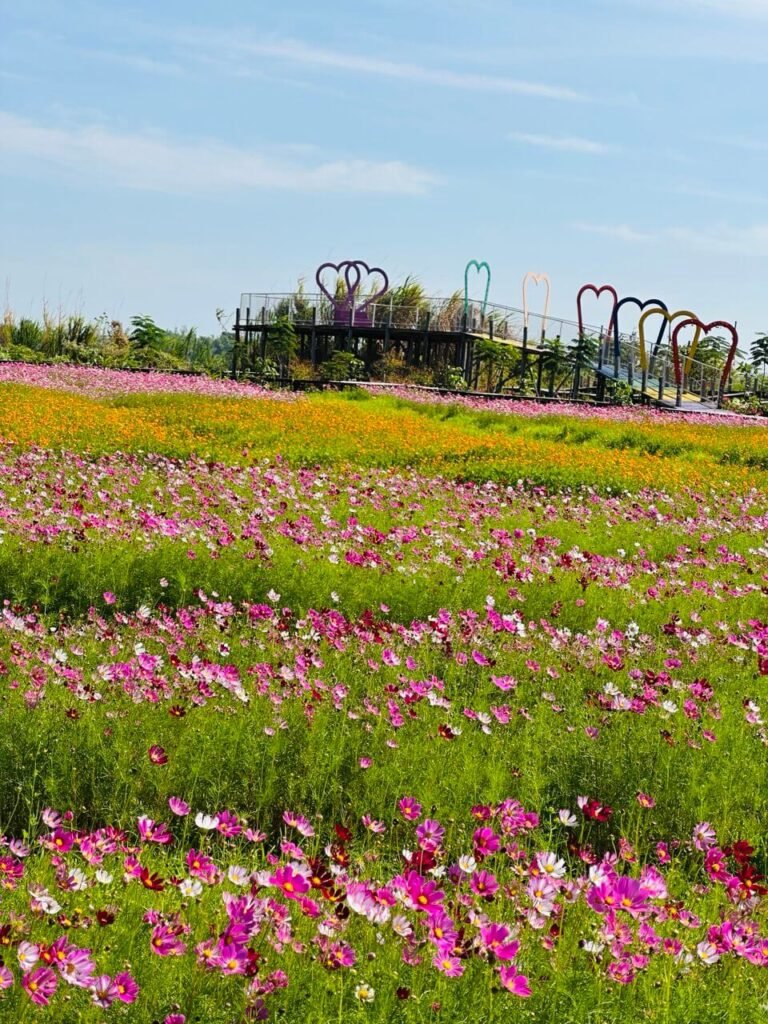
- Interactive Doorways: Our rainbow heart archways work like physical doors between the flower beds and the bridge. Stepping through the arches creates a distinct psychological transition from one zone to another.
Step 4: Give Every Section a Specific Job
Never divide a garden into sections just for the sake of making shapes. Every zone must have a clear purpose, foot-traffic plan, and plant palette. At Dream Garden, we settled on three primary functional zones.
1. The Wow Zone (High-Impact Visuals & Photography)
Positioned directly at the entrance, this zone is designed to make an immediate impression. Here, we planted drought-tolerant, high-bloom flowers that thrive in full sun without requiring heavy fertilization:
- Pink and White Cosmos (Cosmos bipinnatus): Chosen because they bloom continuously and actually produce more flowers in moderate-to-poor soil.
- African Marigolds (Tagetes erecta): Planted in bold orange ribbons to naturally deter soil nematodes and garden pests.
- Red Canna Lilies (Canna indica): Used along architectural edges for dramatic tropical foliage and height.
2. The Quiet Zone (Low-Traffic Relaxation)
This is where our vibrant A-frame rest houses sit. We intentionally designed this area for low foot traffic to protect the soil from compaction and give guests a peaceful environment away from the main walking paths.
The planting here focuses on perennial shade-tolerant shrubs and fragrant foliage.
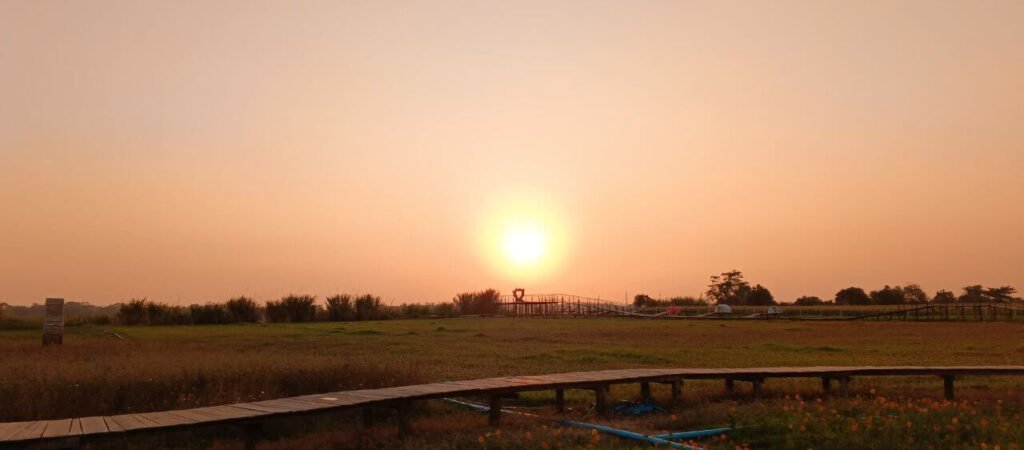
3. The Wild Zone (Waterfront Sunset & Ecological Reserve)
Located down by the waterfront, we left this section largely natural. By allowing native grasses to grow without heavy mowers or chemical fertilizers, this zone acts as an ecological sanctuary for local pollinators, dragonflies, and beneficial ladybugs that help control aphids across our flower fields.
It is also the best unobstructed vantage point for watching the sunset over the water.
How to Divide a Garden Into Sections One Corner at a Time
Dream Garden looks like an ambitious landscape today, but back in 2023, it was nothing more than an intimidating, muddy field. We did not build every zone in a single weekend. We started by conquering one single corner.
First, we staked out and built the main boardwalk pathways so we could walk across the land without sinking into mud.
Next, we laid the painted brick borders for the Star Garden, so our first flower beds were protected from grass runners. Only after those core structures were secure did we add the vertical height features and photography archways.
If you are figuring out how to divide a garden into sections in your own backyard or business plot, stop looking at the entire field at once. Pick a single 10×10 meter corner.
Decide what that specific corner is for—whether it is a seating area, a photography backdrop, or a perennial flower bed—mark its boundaries with a simple DIY border, and build your first outdoor room.
The rest of your garden will follow naturally over time.
Frequently Asked Questions
Do I need a landscape architect to zone my garden?
No. We never hired one for Dream Garden. Walkways, brick borders, and height, like rest houses or trellises, are enough to divide a flat plot into distinct sections.
What’s the cheapest way to border a flower bed?
Materials you already have on hand work well. We used old bricks and cement for the Star Garden borders, and bamboo stakes for other sections, instead of buying decorative stone edging.
Why build curved paths instead of straight ones?
Curved paths hide what’s coming next. That forces guests to keep walking to see around the corner, which makes even a small garden feel bigger and more mysterious.
Can I create privacy in a garden without putting up a fence?
Yes. We used tall grasses, bamboo trellises with climbing vines, and the rest houses themselves to block certain sightlines instead of building a fence.
Should I zone my whole garden at once?
No. We started with one corner of Dream Garden, built the walkways first, then added the borders and the archway over time.
