

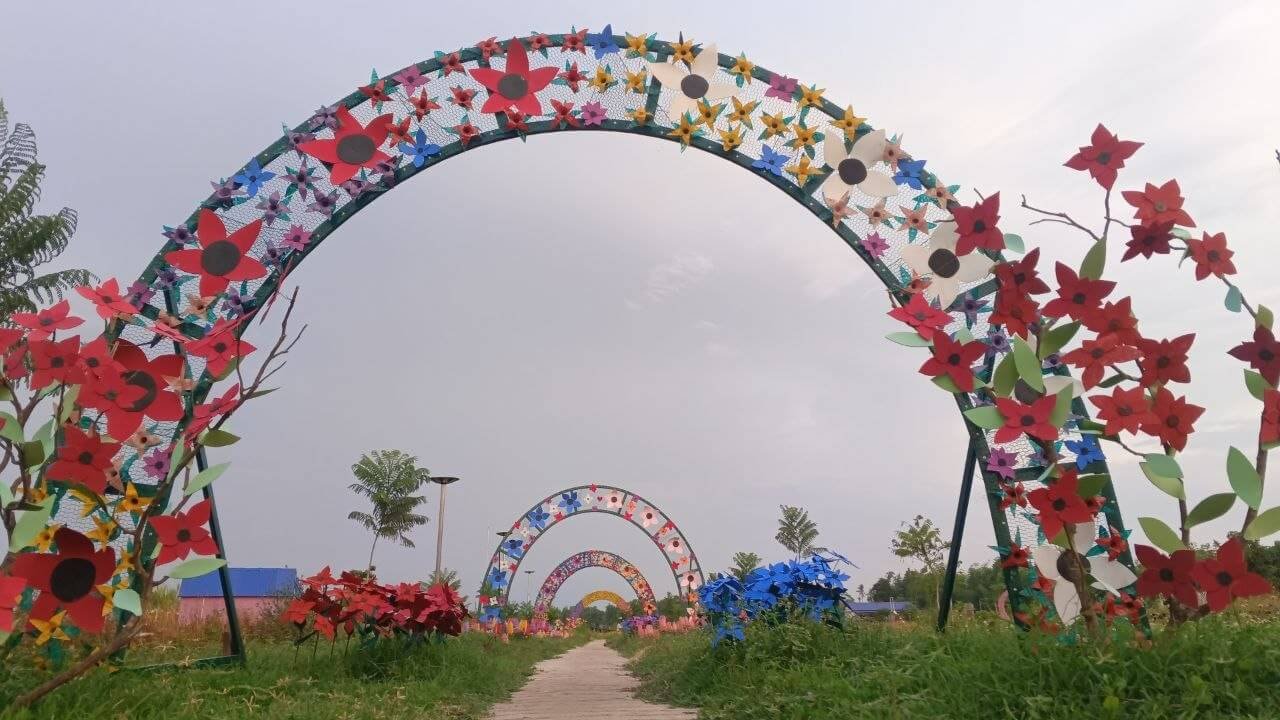
If you look at the towering arch in our Dream Garden, framed by vibrant, multicolored flowers that hold up through heavy rain, strong wind, and extreme heat, you might assume a professional engineering team built it at serious cost.
The truth is the exact opposite. We built our DIY garden arch almost entirely from upcycled scraps we already had on hand, and it cost us close to nothing.
Turning everyday waste into a lively, weather-resistant garden structure has been one of the most rewarding projects our team has taken on.
If you want to build a large-scale, durable garden arch while cutting costs, this guide walks through exactly how we designed and constructed ours from scratch.
Key Takeaways
- Unique Materials: We built a full-size floral garden arch using leftover rubber sheeting, steel tubing, and plastic zip ties.
- Budget-Friendly: Our out-of-pocket cost was $0 because we reused existing materials; buying everything new locally would have cost $40 to $55.
- Weatherproof: The arch has held up perfectly through the intense rainy and dry seasons without shifting.
- Permanent Stability: Concrete anchoring half a meter deep keeps the heavy structure completely stable in strong winds.
The Vision Behind Our Upcycled Arch
Because our Dream Garden is located here in Kratié, Cambodia, our weather swings drastically between a rainy season with heavy downpours and strong winds, and a dry season with intense, blistering heat.
When we first started this garden space, the land was completely bare. Our team needed a structure that could do three things at once:
- Withstand the harsh local climate without rusting or falling apart.
- Provide vertical visual interest to enhance the overall look of the landscape.
- Make the empty plot feel colorful and alive long before any real seeds had a chance to bloom.
That initial brainstorming session became the starting point for one of our favorite examples of upcycled garden decorations: a giant floral archway built almost entirely from discarded materials we already had lying around the property.
Materials and Tools We Used
To make sure the arch would actually survive the weather, we paired heavy-duty metal hardware with upcycled plastics rather than relying on flimsy retail kits.
- Rubber Sheets: Leftover scraps, half-sheets, and fragments from our earlier floral roof project.
- Structural Framework: Four pieces of 10×40 steel tubing and one piece of 10×10 steel tubing.
- Fasteners: Industrial plastic zip ties and heavy-duty outdoor adhesive.
- Paint: U-90 weather-resistant paint, chosen specifically to expand the color palette of our leftover rubber sheets and protect them from UV fading.
- Tools: Heavy-duty shears, utility knives, a welding machine, basic safety gear (gloves/mask), heat guns (or candles) for melting and shaping plastic edges, and wire cutters.
Total cost: Because we repurposed leftover materials and tools already sitting around from the Dream Garden’s initial setup, our actual out-of-pocket cost was $0.
If you had to buy everything locally, expect to spend around $40 to $55. This makes it one of the most budget-friendly DIY garden projects available if you have access to a basic welder.
Step-by-Step Construction Guide
Step 1: Preparing the Upcycled Rubber Flowers
The most time-consuming, yet rewarding, part of this project was preparing the floral elements. We couldn’t just use standard plastic; we needed something thick enough to handle high winds.
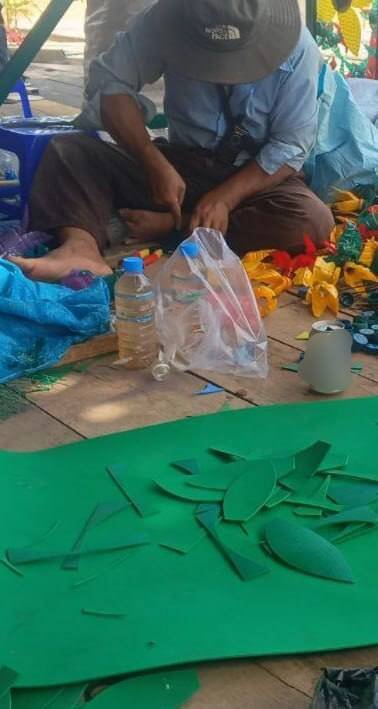
We took our leftover rubber sheets and used heavy-duty shears to carefully cut them into individual petal and leaf shapes.
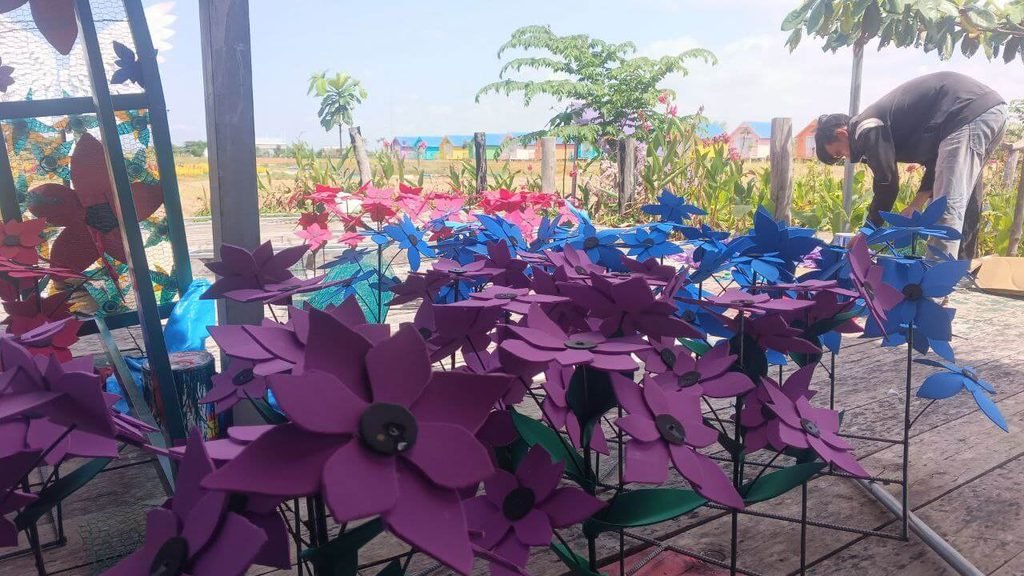
Once cut, we used a heat source to slightly melt and smooth the rough edges. We then machine-sprayed each individual piece in vibrant colors using the U-90 weather-resistant paint and left them out in the intense sun to dry completely.
Step 2: Bending the Steel Tubing and Welding the Frame
A massive arch needs a base strong enough not to buckle under wind pressure. We opted for a twin curved metal frame, heavily reinforced with cross-bracing for extra rigidity.
To get the perfect circular shape, we measured the 10×40 steel tubing and cut small notches at regular intervals. This allowed the thick steel to gradually bend into a smooth curve rather than kinking or snapping.
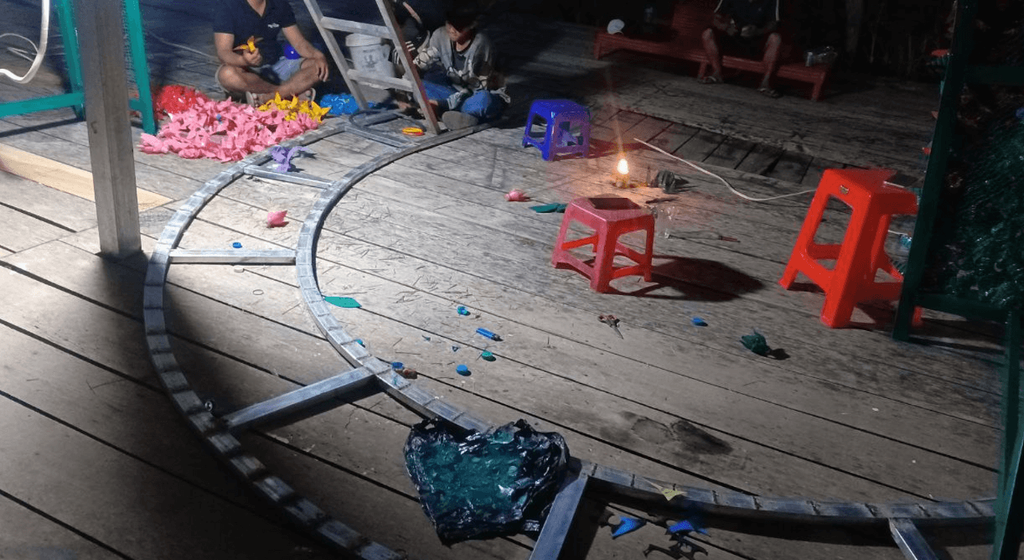
Once the twin frames were shaped and welded together with cross-bars, we attached a strong wire mesh across the entire front facing. This mesh acts as the backing panel to anchor our rubber flowers.
Step 3: Assembling the Structure at Night
After two days of steady drizzle delaying our progress, our team couldn’t wait any longer and tackled the assembly process at night. Working under work lights, we stood the metal skeleton up.
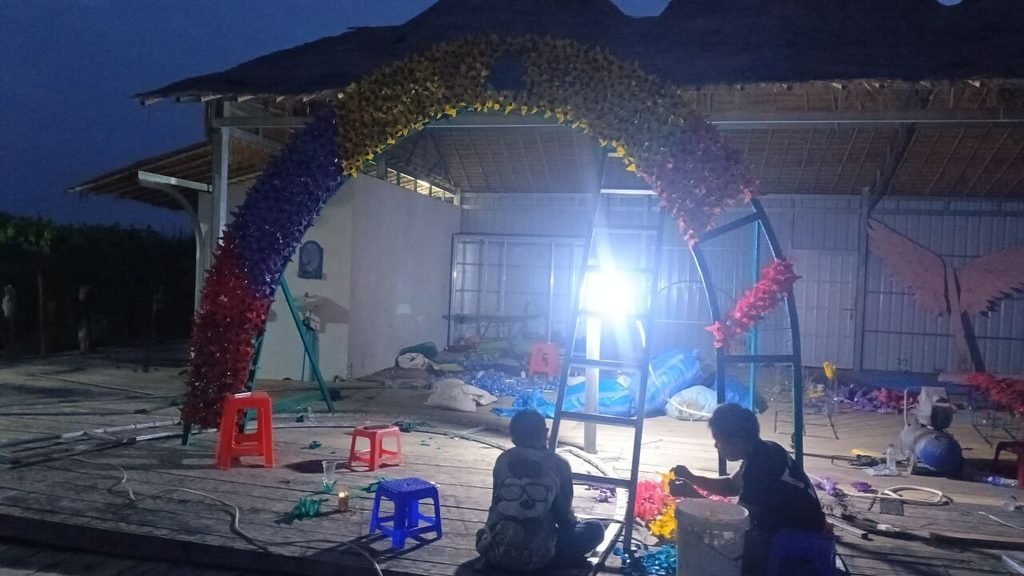
We secured the sun-dried rubber flowers directly to the wire mesh using thick plastic zip ties. We made sure to pull each zip tie as tight as possible and snip the ends, ensuring nothing would rattle or come loose when the heavy winds arrived.
Step 4: Anchoring the Arch in Concrete
To make sure the arch could handle intense weather long-term, you cannot simply push the legs into the dirt. We dug half a meter deep into the earth along the garden pathway.
We placed the steel legs into the holes, leveled the structure, and poured concrete to permanently anchor it in place.
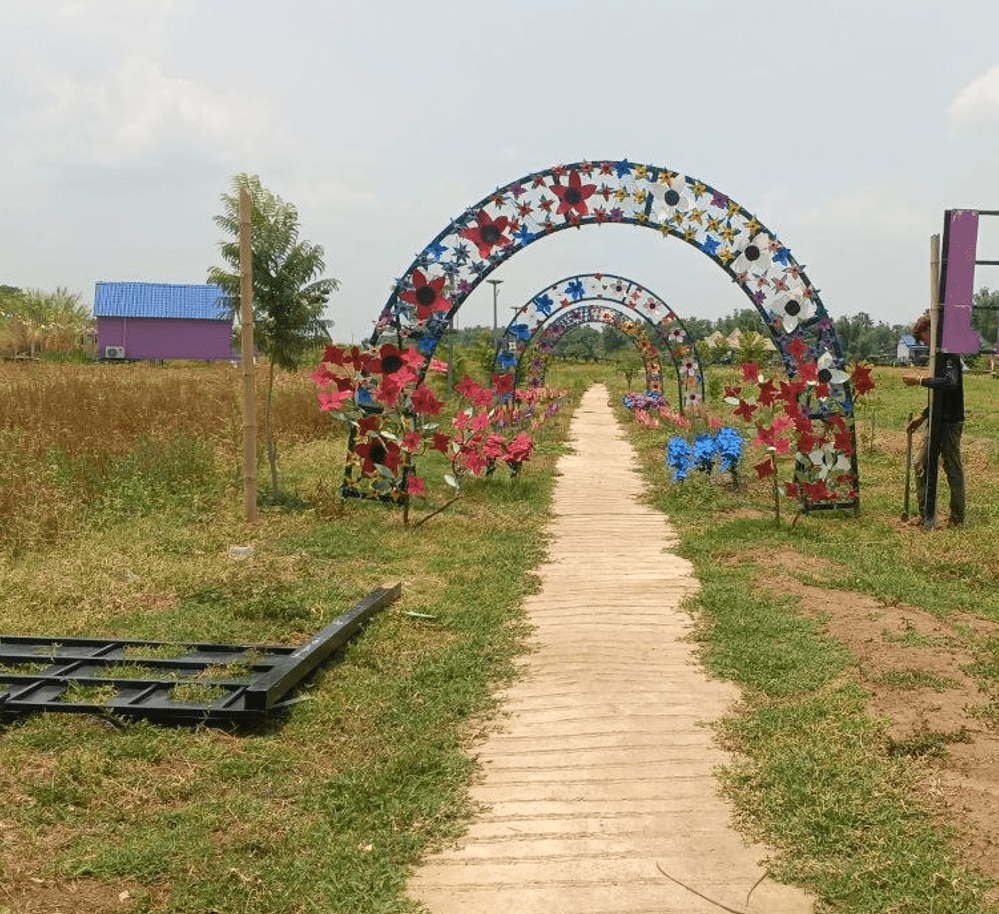
This step matters more than people expect. A beautiful arch that shifts or leans after the first storm defeats the purpose of building something this heavy.
The Final Result: Community Art That Lasts
When we first put the arch up and the concrete cured, the surrounding garden hadn’t bloomed yet. But just 20 days later, this upcycled structure was surrounded by a sprawling, vibrant field of blooming zinnias.
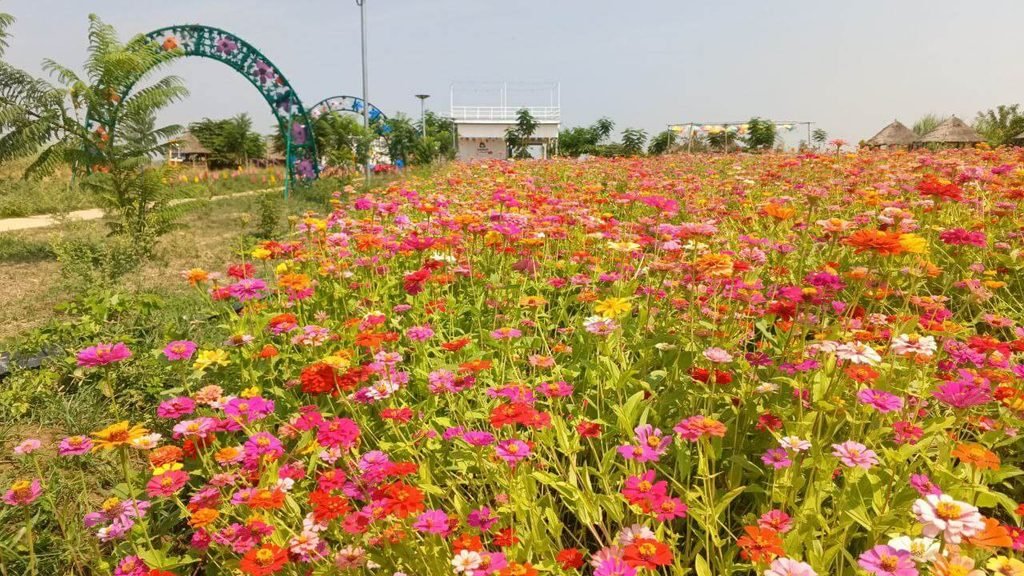
It is absolute proof that with a bit of structural planning and some elbow grease, discarded materials can become lasting community art rather than landfill waste.
Why Our Upcycled Structure Holds Up
The concrete anchoring and the welded, cross-braced steel frame are the real reasons this arch has made it through a full rainy season without shifting or sagging.
The upcycled rubber flowers give the arch its personality, but the hidden heavy-duty frame and deep footing are what keep it standing tall.
Frequently Asked Questions
Does an upcycled garden arch actually survive rain and wind?
Ours has held up through a full rainy season of heavy downpours and strong wind, largely because of the concrete anchoring and cross-braced steel frame rather than the flowers themselves.
What can I use instead of rubber sheeting for the flowers?
We used leftover rubber sheet scraps from an earlier project. Any weather-resistant plastic sheeting that holds paint and can be cut with scissors or a utility knife should work in a similar way.
Do I need welding experience to build something like this?
Yes, for the frame itself. We used a welding machine to join the steel tubing into a twin curved arch with cross-bracing, so you’d want either welding skills or a welder’s help for that portion.
How much does a DIY garden arch like this cost to build?
Our actual cost was zero since we reused materials already on hand. Buying everything locally would run roughly $40 to $55, depending on local pricing for steel tubing and paint.
How long does an arch like this take to build?
We don’t have an exact hour count, but the flower-cutting and painting stage was the most time-consuming part, and final assembly happened over one night after a two-day weather delay.
