

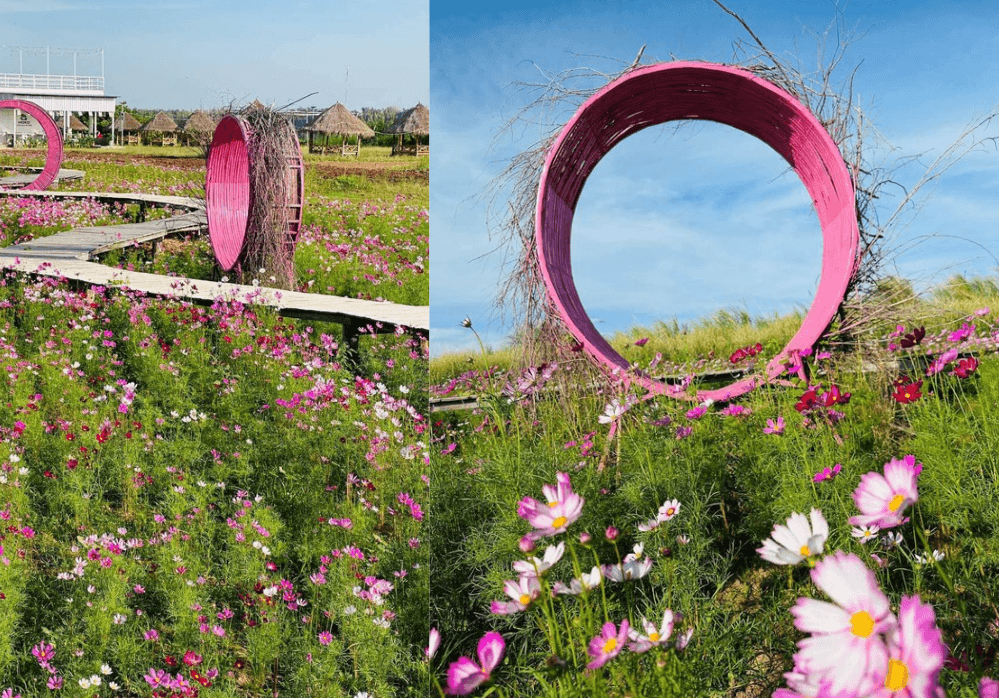
If you have ever wondered how to turn an empty, flat field into a place people actually want to visit, this DIY rebar garden arch project is proof that you do not need a big budget to pull it off.
At Dream Garden, we built a giant garden portal standing 4.5 meters tall and 2.5 meters wide, using nothing but rebar, bamboo, and a lot of stubborn patience—total material cost: $33.50.
Key Takeaways
- Budget-Friendly Impact: Built a 4.5m tall, 2.5m wide circular garden arch for just $33.50 in materials.
- No Machinery Required: Learned how to bend 10mm (#3 gauge) rebar into a circle by hand using a ground-stake anchor.
- No Welding Necessary: Connected rebar sections securely using 30 cm overlaps and heavy-duty galvanized tie-wire.
- Real-World Timeline: The build took 6 days in total—including 4 days of trial-and-error.
- Natural Texture: Wrapped the metal frame in split bamboo strips and dried Rai tree branches for a rustic finish.
- Instant Focal Point: Became the garden’s main centerpiece and favorite visitor photo spot.
From Empty Field to a Garden Worth Photographing
If you have followed our journey at Dream Garden, you already know we started with a massive, flat, empty plot of land. We tackled the “flat” problem first, laying out distinct zones with brick borders.

We added personality with smaller builds along the way, like our DIY concrete star garden. One early highlight was a large DIY heart shape built right in the middle of our flower garden, which already brought in a steady stream of visitors on its own.
But as the garden filled in, something was still missing. We needed one big centerpiece—something large enough to draw the eye across the whole landscape and make visitors stop and say, “I have to take a photo with that.“
In gardening terms, that is called a focal point. On social media, people just call it an Instagram trap.
A professional garden sculpture at this scale usually runs into the thousands of dollars. We did not have thousands. We had about $35 and a slightly crazy idea to build something huge out of thin rebar.
Planning a DIY Rebar Garden Arch: A Cheap Garden Focal Point Idea
I wanted something tall enough to break up the flat horizon line. A standard curved archway felt too safe—too ordinary for what the space needed.
What I really wanted was a complete circle, a giant ring that would frame the Cosmos flowers growing right behind it. That single design choice is what turned this into one of the more unusual cheap garden focal point ideas we have tried.
The plan looked simple on paper: buy rebar, bend it into a circle, wrap it in bamboo for texture, then paint it a bright, eye-catching color. I thought the whole build would take two days. It actually took six.
Why a Full Circle, Not Just an Archway
A curved arch is common. A complete ring—tall enough to walk through and wide enough to frame a whole flower bed behind it—is not something you see on every garden path.
That was the entire point. We wanted visitors to stop walking and start taking photos, and a bold, unfamiliar shape does that far better than a shape they have already seen a hundred times.
How to Bend Rebar Into a Circle by Hand
Let’s be honest: the process was not easy. The hardest part was never the cost. It was the physics.
The Challenge
How do you bend straight rebar into a perfectly round circle, 2.5 meters wide, without expensive heavy machinery? I will tell you exactly how: the hard way.
For the first four days, we did almost everything wrong. We tried bending the rebar by hand and ended up with something that looked like a crooked egg. We tried using nearby trees as leverage to force the bend.
We wasted materials. We got stressed. It turns out it is genuinely difficult to bend metal into a perfect circle when it is just two people, out in the middle of an open field, with no equipment.
The Method That Finally Worked: Bending a DIY Rebar Garden Arch by Hand
Eventually, we found our answer. Using 10mm (#3 gauge) rebar—which is thick enough to hold structural integrity but thin enough to shape without hydraulics—we drove a sturdy wooden stake into the ground to anchor one end of the rod.
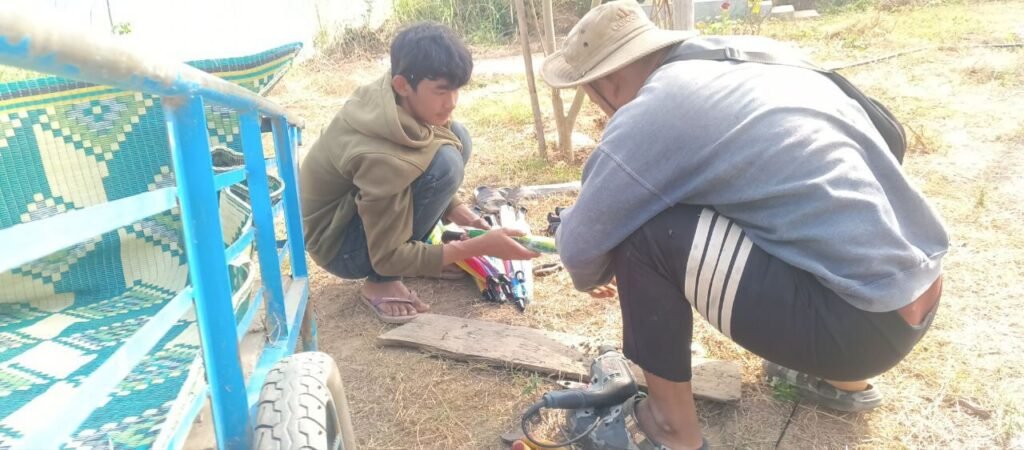
By pulling against this anchor point, we could bend the metal gradually and evenly instead of forcing it all at once.
We joined five separate pieces of rebar this way, section by section, until they formed one large, continuous circle.
How We Joined the Sections Without Welding
Because we did not have a welding torch out in the field, we relied on mechanical binding:
- We overlapped the ends of each rebar piece by approximately 30 centimeters (12 inches).
- Using heavy-duty galvanized tie-wire, we wrapped each overlapping joint tightly at three separate points along the overlap.
- Once tensioned, the 10mm rebar locked together solidly, creating a rigid structural ring capable of supporting wind and exterior wrapping.
Once that metal frame was finally solid, everything else moved much faster.
Building a Bamboo Wrapped Metal Arch
With the rebar circle complete, we moved on to texture. We took bamboo poles, each about three meters long, and split them lengthwise into thin, flexible strips.
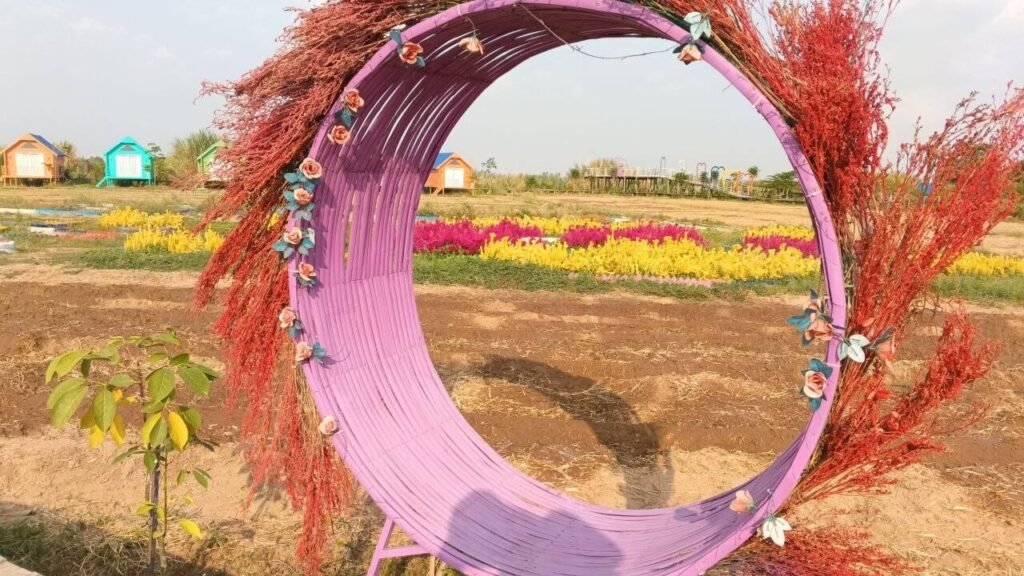
We wrapped those strips tightly around the metal core until the entire ring was covered. Then we added dried branches, gathered from local Rai trees, to give the whole structure a wild, natural, rustic feel. Only after all of that texture was secured did we start painting.
Garden Arch Without Welding: The Full Budget Breakdown
People who see this arch in person almost always guess it cost hundreds of dollars to build. It did not.
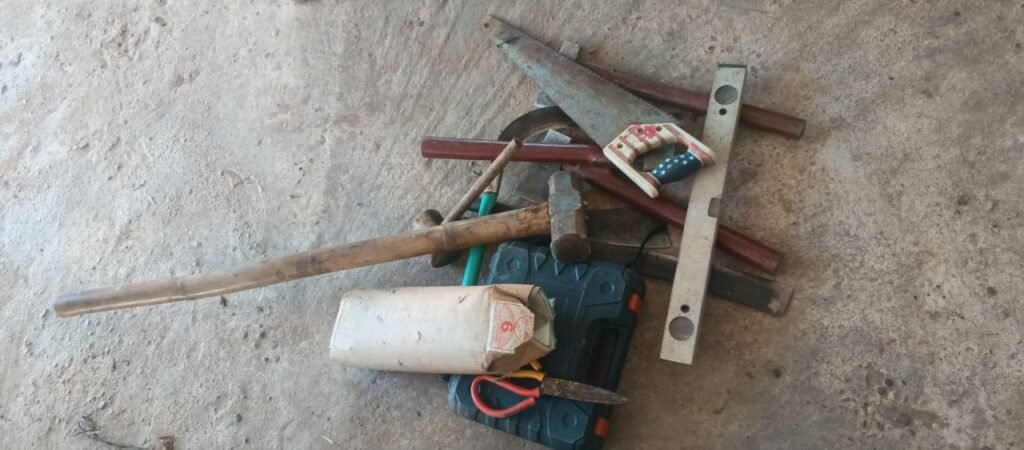
Here is the actual bill, with the note that local material prices may vary slightly depending on where you live, though the technique itself stays the same.
Budget Garden Sculpture Cost Breakdown
| Material | Specification / Use | Cost (USD) |
| 5 Pieces of Rebar | 10mm (#3 gauge), standard length | $22.50 |
| 3 Bamboo Poles | 3 meters long, split into strips | $4.00 |
| Hardware Pack | Galvanized tie-wire & wood screws | $3.00 |
| 2 Cans of Paint | Exterior-grade bright purple/pink | $4.00 |
| TOTAL | $33.50 |
The real cost was never the money. It was six days of hard, occasionally stressful labor spent getting the shape exactly right, all without professional metalworking equipment.
The Result: A New Destination in the Garden
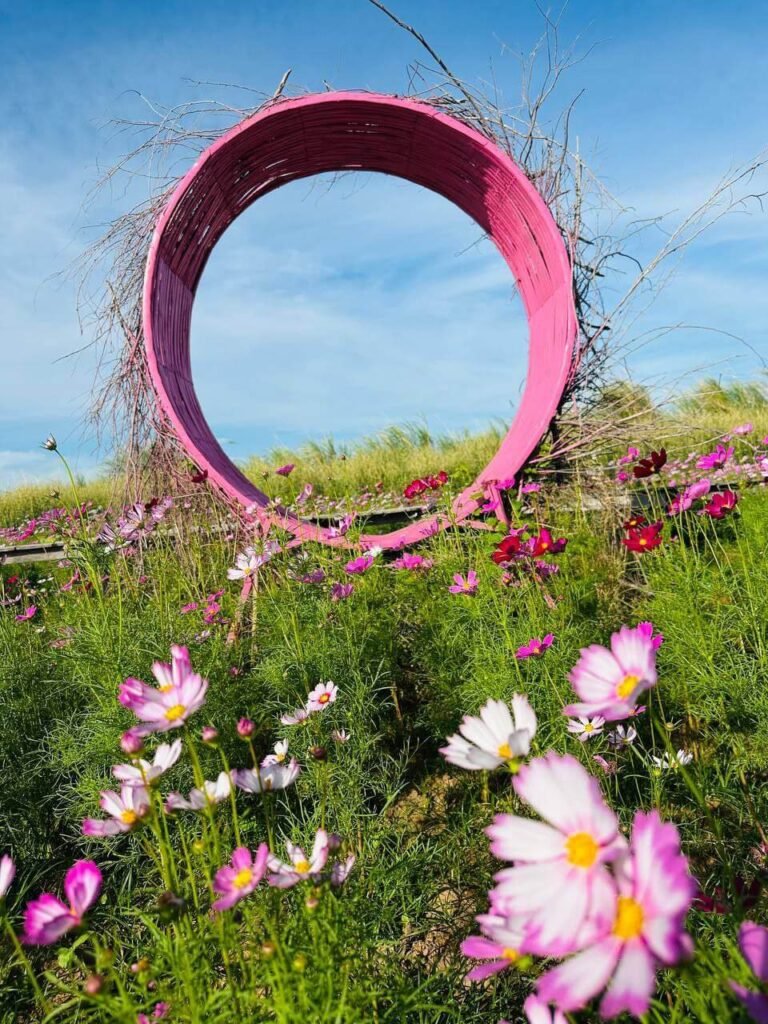
The finished arch is genuinely massive, standing 4.5 meters tall and 2.5 meters wide. Before we built it, visitors would look at the flower fields from a distance and keep walking.
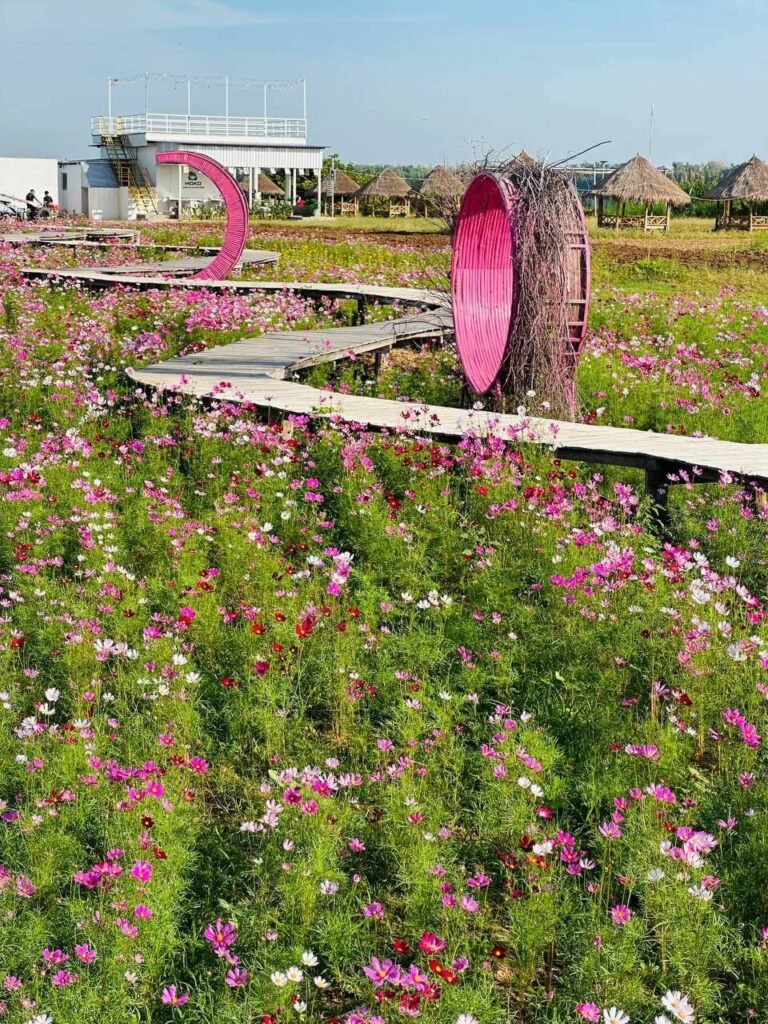
Now they follow the brick pathways, step onto the wooden boardwalk, and head straight for that giant pink ring. It frames the landscape perfectly, and the bright pink contrasts beautifully against the green grass and the soft, natural colors of the surrounding flowers.
It has become exactly the focal point we set out to create.
Don’t Be Afraid to Build Big
This project taught us that you do not need expensive materials to make a big impact. What you actually need is time, patience, and a willingness to fail for a few days before you get it right.
If you have a large garden space that still feels a little empty, do not just fill it with more small shrubs. Consider one large, simple structure instead—the same way a DIY rebar garden arch changed the entire feel of our space.
Just maybe practice bending rebar on smaller test pieces first!
Safety Precautions & Practical DIY Tips
If this project has you thinking about attempting your own version, keep these essential safety guidelines in mind before starting:
- Watch for Tension Spring-Back: Rebar holds significant kinetic tension while it is being bent. If your grip slips or your anchor stake gives way, the metal can snap back violently. Always wear thick leather work gloves and shatterproof eye protection.
- Select the Right Gauge: Do not attempt to bend rebar thicker than 10mm (#3 gauge) by hand. Thicker metal (#4 or #5 gauge) requires mechanical pipe benders to curve safely without kinking.
- Scale to Your Space: Measure your available pathway width before committing to a 2.5-meter circle. Scaling the design down to a smaller diameter uses the same bending principle—anchor one end and bend gradually—while requiring less rebar, less bamboo, and less time overall.
- Embrace the Imperfections: Expect your first bend attempt to look slightly out of round. That is normal for freehand metalwork, and once you wrap the frame in bamboo and branches, minor structural variations disappear entirely.
Frequently Asked Questions
Is it possible to bend rebar into a circle without a bending machine?
Yes. Anchoring one end with a ground stake and bending the metal gradually, rather than trying to force the curve all at once, was the method that worked for this project, with no machinery involved.
How much does a DIY garden arch like this actually cost to build?
This specific rebar and bamboo garden arch came to $33.50 in materials, covering rebar, bamboo poles, tie-wire, and paint. Prices will shift depending on local material costs where you live.
How long does it take to build a garden arch this size?
This build took six days total. Four of those days went into failed bending attempts before the working method was found, and the rest of the time went into wrapping, decorating, and painting.
What can I use besides bamboo to decorate a metal garden arch?
Dried branches, vines, or other natural material sourced locally can add texture and a rustic look, similar to the dried branches from local Rai trees used in this build.
Do I need welding experience to build a garden arch without welding?
No. This project joined the rebar sections using tension, gradual bending, and tie-wire or screws rather than any welding equipment.
